Introduction
In the previous tutorial we displayed a static cube wireframe, which appeared as a square. In order to get a sense of its three dimensions, we must be able to move it in three dimension. But first, we'll introduce some basic transformations, which don't require a third dimension. In this tutorial, we will:
- Add a function to translate wireframes
- Add a function to scale wireframes
- Apply these transformations using the keyboard
By the end of the tutorial, we'll be able to move and scale the square as shown in the video.
The final code can be found by clicking the Github link above.
Translation in 3D
The simplest transformation is a translation: moving the wireframe along an axis by adding a constant to the x, y or z coordinate of every node. For this, we add the following method to the Wireframe class:
def translate(self, axis, d):
    """ Translate each node of a wireframe by d along a given axis. """

    if axis in ['x', 'y', 'z']:
        for node in self.nodes:
            setattr(node, axis, getattr(node, axis) + d)
The translate() method takes the name of an axis and distance that the wireframe should be translated. It adds the distance, d, to the relevant coordinate of every node in the wireframe. We use getattr() and setattr() so we can easily define which attribute we want to change.
For example, to move our cube 100 pixels to the right, we get and set the attribute 'x':
cube.translate('x', 100)Because the y-axis of the screen starts at the top and points down, to move our cube up 40 pixels, we call:
cube.translate('y', -40)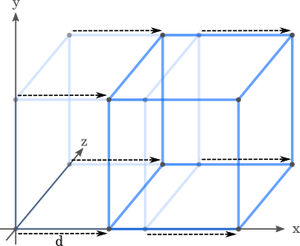
Translating along the z-axis will have no noticeable effect at the moment.
Scaling in 3D
Scaling is also relatively straightforward. We could simply multiply the x, y and z values of each node by a scaling factor, which would have the effect of scaling the cube centred on the origin. However, for more flexibility we can scale from any centre. using the following method:
def scale(self, (centre_x, centre_y), scale):
    """ Scale the wireframe from the centre of the screen. """

    for node in self.nodes:
        node.x = centre_x + scale * (node.x - centre_x)
        node.y = centre_y + scale * (node.y - centre_y)
        node.z *= scale
So if we pass in the centre of the screen, the function scales the distance of each node from the centre (ignoring the z coordinate). If we assume that the screen is at z=0, then nodes behind the screen move closer as we scale down, and further away as we scale up.
For example, to scale our cube by three quarters, centred on the screen's centre:
cube.scale((200, 150), 0.75)
Keyboard controls
In order to easily use these transformations we can associate them with keys and call them (with some arbitrary value) in response to key presses. We've arranged our code so that the display of the wireframes using Pygame is in a file called displayWireframe.py. This code should also handle keyboard inputs using Pygame. First we'll add some methods to the ProjectionViewer class to transform all its wireframes (and to calculate the centre of the screen):
def translateAll(self, axis, d):
    """ Translate all wireframes along a given axis by d units. """

    for wireframe in self.wireframes.itervalues():
        wireframe.translate(axis, d)

def scaleAll(self, scale):
    """ Scale all wireframes by a given scale, centred on the centre of the screen. """

    centre_x = self.width/2
    centre_y = self.height/2

    for wireframe in self.wireframes.itervalues():
        wireframe.scale((centre_x, centre_y), scale)
We can then associate these methods with keys with a dictionary that maps keys to lambda function. I've written in more detail on how this code works here. You can use whichever set of keys you find most logical.
key_to_function = {
    pygame.K_LEFT:   (lambda x: x.translateAll('x', -10)),
    pygame.K_RIGHT:  (lambda x: x.translateAll('x',  10)),
    pygame.K_DOWN:   (lambda x: x.translateAll('y',  10)),
    pygame.K_UP:     (lambda x: x.translateAll('y', -10)),
    pygame.K_EQUALS: (lambda x: x.scaleAll(1.25)),
    pygame.K_MINUS:  (lambda x: x.scaleAll( 0.8))}
Finally we need to check whether a key is pressed, and if it is, and it's one that's in key_to_function, we call the relevant function. We do this by adding the following code into the loop in the ProjectionViewer's run() method:
elif event.type == pygame.KEYDOWN:
    if event.key in key_to_function:
        key_to_function[event.key](self)
This is a slightly indirect way to do things - the function is called, sending the ProjectionViewer object (referred to by self), to the lambda function, which then calls the translate or scale function of ProjectionViewer. The advantage of this method is that it makes it easier to add or change key commands.
We can now manipulate our cube wireframe to a degree, but it still looks like a square. In the next tutorial, we'll introduce another transformation - rotation - which will finally allow us to see another side to our square and see that it really is a cube.
Comments (5)
kitsunekarishnacov on 7 Nov 2016, 8:50 a.m.
Hey, just running through the tutorial myself. Really great so far.
Had some trouble with the 'translateAll()' function when interpreting it though, the itervalues() function doesn't seem to work with dictionaries in python 3.
However changing the method to .values() works. maybe consider leaving a note for future learners, incase they encounter the same trouble as I ^w^
DeadZombie14 on 18 Nov 2018, 7:12 p.m.
@kitsunekarishnacov thanks a lot bro, :)
Jack on 5 Jan 2019, 2:07 p.m.
Hi, Great tutorial, but can you improve translate method, please.
RMI78 on 12 May 2019, 3:20 p.m.
tuple unpacking as argument of a function is also no longer supported in python 3, so a great way to bypass this is to unpack the tuple inside the function and take the tuple as it is as argument:
def scale(self, center, scale):
center_x, center_y = center
#the rest of the code
Jack (not the above one though) on 9 Nov 2019, 1:02 p.m.
@RMI78 Legend